[Observation] Interactive Technology in Public

I'm new to New York and one of the items that caught my eye on the city streets when I moved here were these info booths called LinkNYC.Here's a picture I took of one in Midtown, Manhattan

LinkNYC


LinkNYC is a first-of-its-kind communications network that will replace over 7,500 pay phones across the five boroughs with new structures called Links. Each Link will provide super fast, free public Wi-Fi, phone calls, device charging and a tablet for access to city services, maps and directions.

Public Observation

For this assignment we were to observe an interactive technology in public and so I decided to head back to one of these terminals to see how the general public used these devices.

First of all, I waited for a LONG time before someone even gave it a second look.  It's too bad because they really are a very useful.

I saw, what appeared to be, a tourist walk up to one of LinkNYC's info booth after quite a bit of time.  The first interaction that the individual had with the terminal was that they tried to interact with the large display on the side of the terminal where the ads are hosted to see if it was interactive.  They aren't. Technology today, especially interactive technology, is often very focused around screens and touching and swiping them, so I guess this behaviour isn't entirely uncalled for here.

They quickly determined that the screen wasn't interactive and moved to the side of the terminal where there is a touch screen , a much smaller one, where you can use free WiFi and use the map feature to easily navigate to your next destination.

The tourist used the map function to determine where they needed to go next and proceeded on their way.

I do really think that these terminals are well designed..  It's very obvious what functions it allows you to do, once you get to section of the terminal shown in the picture above.

Motor Analog Out

For our second assignment we were to create a simple application of digital or analog input and digital output.  I choose to work with analog input and digital output because I was interested in using a potentiometer.

Motorized Disc

The potentiometer supplied the PWM (pulse width modulation) analog input and the DC motor received the digital output.  The potentiometer was the component that determined the varying speed of the rotating disc as seen in the demo below:

I used the resources and kit supplied in the Arduino Starter Kit and amped the Motorized Pinwheel (pg 95 in the Arduino Projects Book) that was originally controlled via a digital input (button) to a circuit that was controlled from an analog input (potentiometer).

The difficultly that I had in this project was how to slow the speed of the motor.  I observed the

Serial.println(motorSpeed)

and tried to use the

map()

function to map the min and max numbers I observed in the Serial Monitor to reduce the speed, but I had no luck with that.  I will ask the professor and report back once I have a better idea of how to tackle this problem.

Below is the code that I used to program this circuit:

const int POT_PIN = A0;
const int MOTOR_PIN = 2;
int motorSpeed = 0;
int potVal = 0;

void setup() {
 pinMode(MOTOR_PIN, OUTPUT);
 //Serial.begin(9600);
}

void loop()
{
 potVal = analogRead(POT_PIN);

 motorSpeed = map(potVal, 0, 1023, 127, 255);

 analogWrite(MOTOR_PIN, motorSpeed);
IMG_2353.jpg

Switch + LED Circuit

Project Expectations

For our second class assignment, we were asked to create a simple application of switch and LED circuit.

Below is my pushup switch:

Motivation

After moving to Manhattan, I've been feeling the roughness that the city can exhibit.  With this in mind, I feel like it's important to take my personal safety into my own hands.  Strength building is something that I haven't been great with in the past, but it's never too late... right?

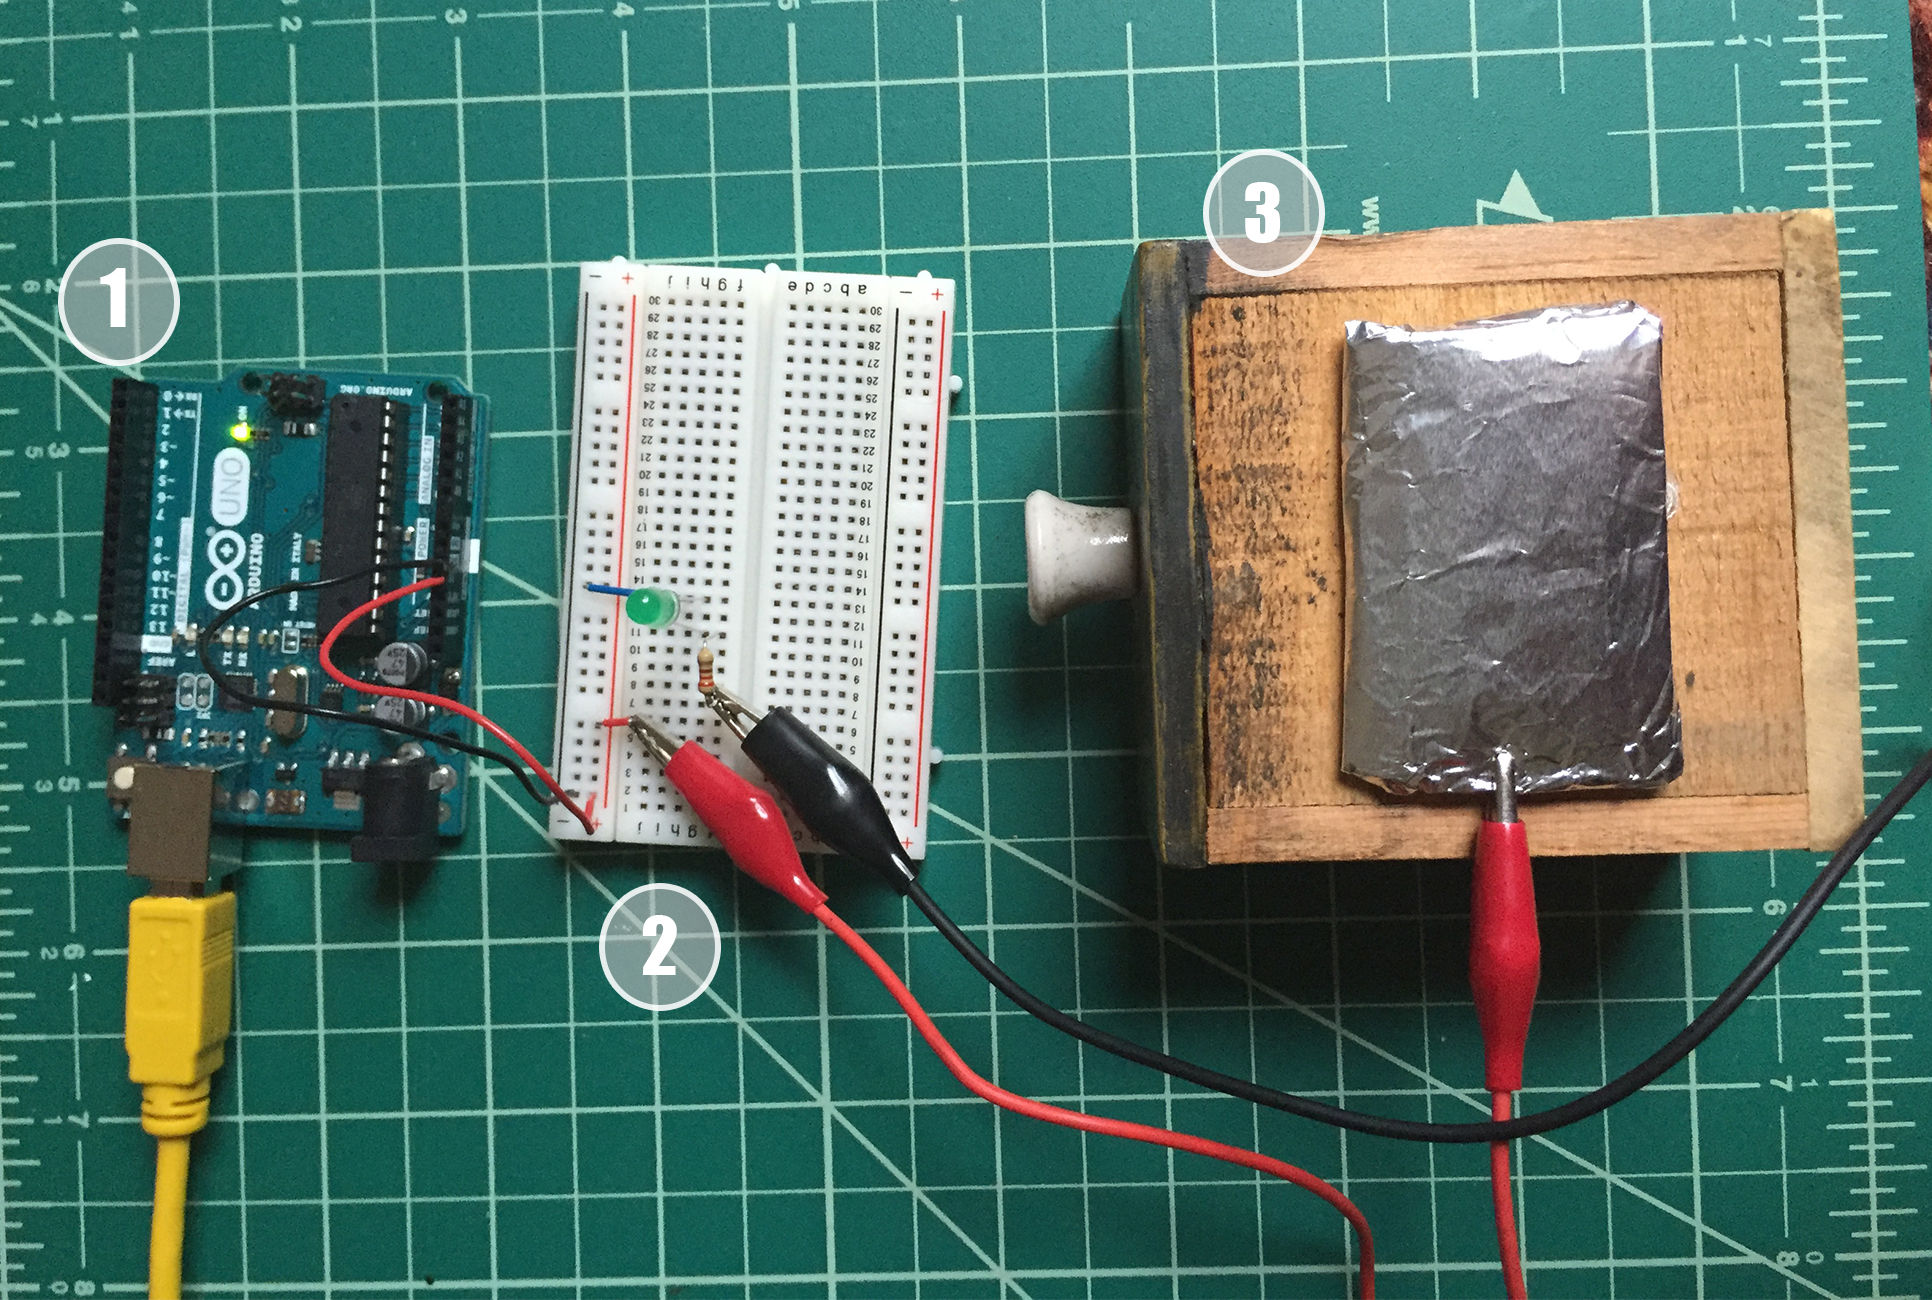
I decided to create a circuit that is only closed when an proper full pushup is completed.  When my nose, wrapped in conductive copper tape, touches the aluminum-covered pad, the green LED lights up to indicate a complete circuit and perfect pushup.

Components


Nose attachement:
  • copper tape
  • black jumper wires
  • alligator clip jump wire

file-sep-19-6-30-40-pm

Circuit:
  1. Arduino Uno
  2. Breadboard with 220 Ohm resistor, green LED, and alligator clip jump wires
  3. wooden platform with aluminum-wrapped landing pad and alligator clip jump wire


setup